DIY Patio & Walkways: How to Guide
Dreaming of ideas to revamp your outdoors? Thinking of jumping into the project yourself? You’re in the right place! Building your own DIY Patio or Walkway can sound like an overwhelming project, but with a few tips and a little direction it can actually be very achievable for the handy do it yourself-er type! This guide will help you decide if you are ready to take on the project.
First Step: Choose your design layout!
The possibilities of designs are endless. Let your creative magic go to work! If you are looking for design ideas for your DIY Patio or Walkway, please visit our Pinterest page for inspiration! Link>Estes Pinterest
Second step: Choose your product!
The second step in designing your DIY Patio or Walkway is deciding what material you are using. We have product options to fit all budgets. (please click the product names to be directed to more info about each product)
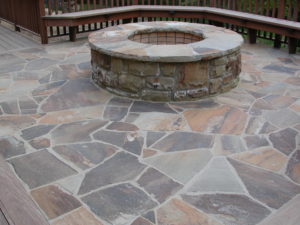
Natural stone flagstone flooring products that are irregular in shape. These products will give you a mosaic look!
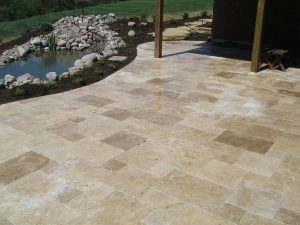
Natural stone dimensional or patterned flooring is natural stone that has been cut on all four sides to give you a square, traditional look. We also have imported products that are available in Travertine, Sandstone, and Marble.


How much do you need? Let’s estimate your DIY Patio or Walkway project!
Natural Stone:
Determine Length____ x Width__________
Calculate: Length x Width = (square foot)
Dimensional Cut Flagstone & Manufactured Pavers are sold by the square foot, you will have your total square footage for ordering.
For flagstone sold by the ton:
Square foot /90 =_______ = # of tons needed
- Note this is an estimation of 90 square foot of coverage per ton for natural stone. Most products vary from 85-120 sq. ft. of coverage depending on thickness and type of product. Please ask us when ordering.
Now let’s get to the work!
What you will need:
- Small rubber mallet
- Tape measure
- Carpenter’s level
- Marker stakes
- String line
- Metal rake
- Edging material or 4×4 treated lumber
- Hand tamper or Wacker packer machine
- Pick and shovel
- Selected paver/flagstone material
- Crushed stone
- Polymeric sand or Stone dust
DIY Patio or Walkway Step by Step Directions:
The following guide demonstrates in illustration the step by step directions used to build a patio, walkway, or garden path. This project can be completed by one or two people, with a minimum of supplies and a few basic tools and supplies as listed above. The design possibilities are endless, once you have your design follow this guide to create your masterpiece!
Step 1: Outline the size and shape of your patio or walkway. Use stakes and string to mark the outside desired corners or at any curve or bend. It’s always a great idea to call before you dig. Please take note to any utility lines that may be in your area before you drive stakes or dig.
Step 2: Remove 6″ of dirt to prep the designed outlined project area. If drainage is an issue: excavate 8-10″. Add 2-4″ of a crushed limestone base. Compact the base. Add any appropriate drainage piping around the perimeter of the area.
Step 3: Created the edges of the patio with selected edging material chosen. If you are using 4×4 treated lumber, secure the lumber with rebar. Lumber is only ideal for square shaped projects. For curved patios or walkways, use gator flex edging or any flexible edging product.
Step 4: Add 1-2″ of dust/sand in the area. Wet and tamp the sand leaving 1.5″ exposed of the edging boards. (Leave the edging exposed the thickness of your product, most exterior flooring is around 1.5-2″ thick)
Step 5: Start laying your flagstone or pavers. When setting each piece tamp and wiggle them in place with the rubber mallet. Use the carpenters level to float over the patio to keep your stones level. You can take away or add more sand to adjust for any height discrepancies from piece to piece. Depending on the chosen appearance of the project joints can be up to 4″ wide. Whichever thickness you choose, keep it consistent throughout the project.

And that’s a wrap!
Give yourself a pat on the back! Clean up your work site, invite over a few friends, and kick back and enjoy your new outdoor space!
Rather you decide to DIY or use a landscape professional, we are happy to assist with your project. Please choose us as your landscape supplier! We stock the highest quality products and have enjoyed supplying Indiana for over 40 years. Our knowledgeable staff would be happy to answer any questions about your project, so please do not hesitate to give us a call. 812-546-6181


